How to Install EV Hover Extender
Check EV Hover Parts Before Commencing
Carefully unpack the EV Hover box and confirm you have received all the parts and tools, and they have not been damaged during transit. Contact EV Hover Customer Support if you find anything damaged from shipment, before installation.
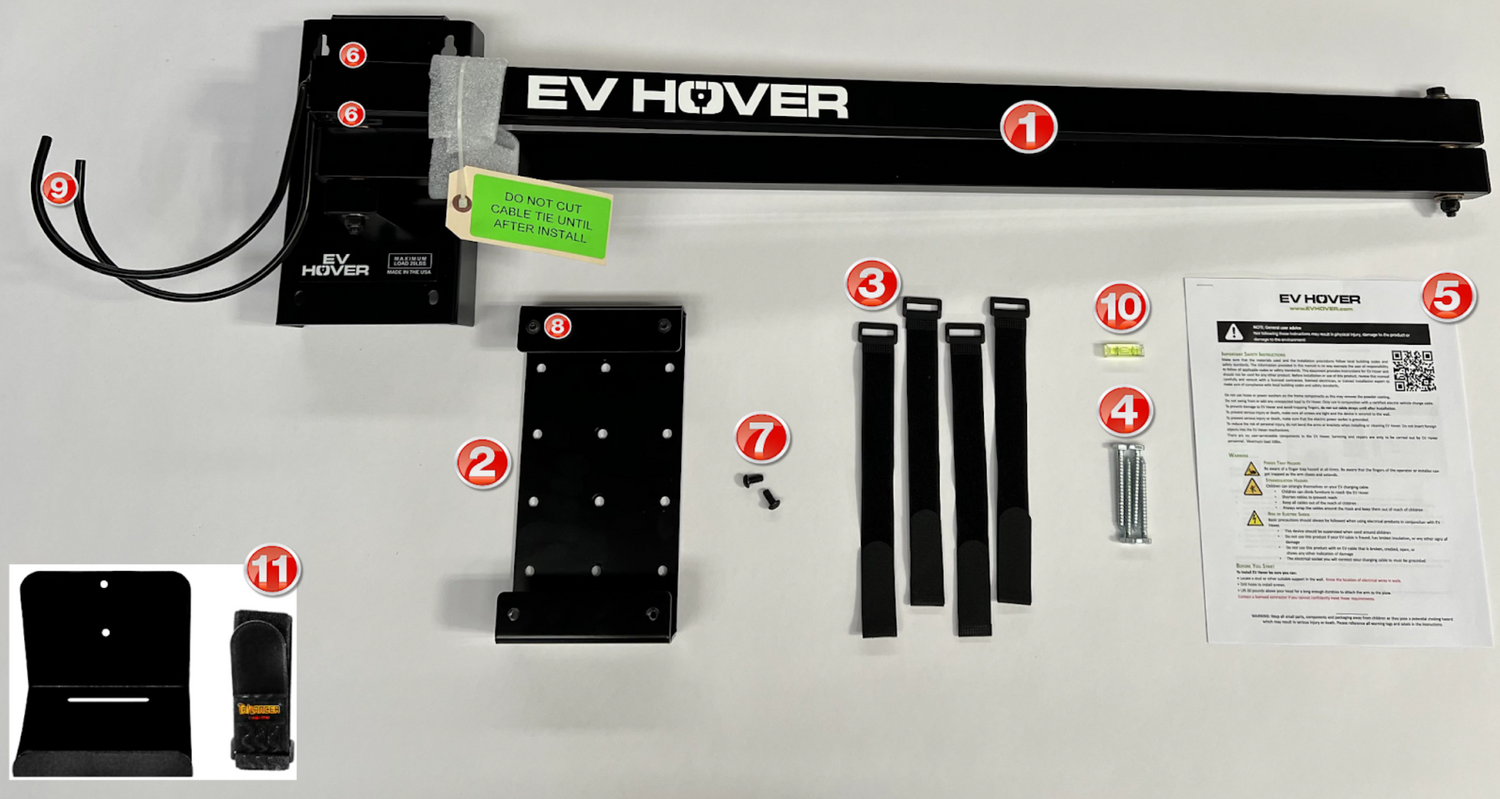
EV Hover Parts that came with original unit
[1] EV Hover
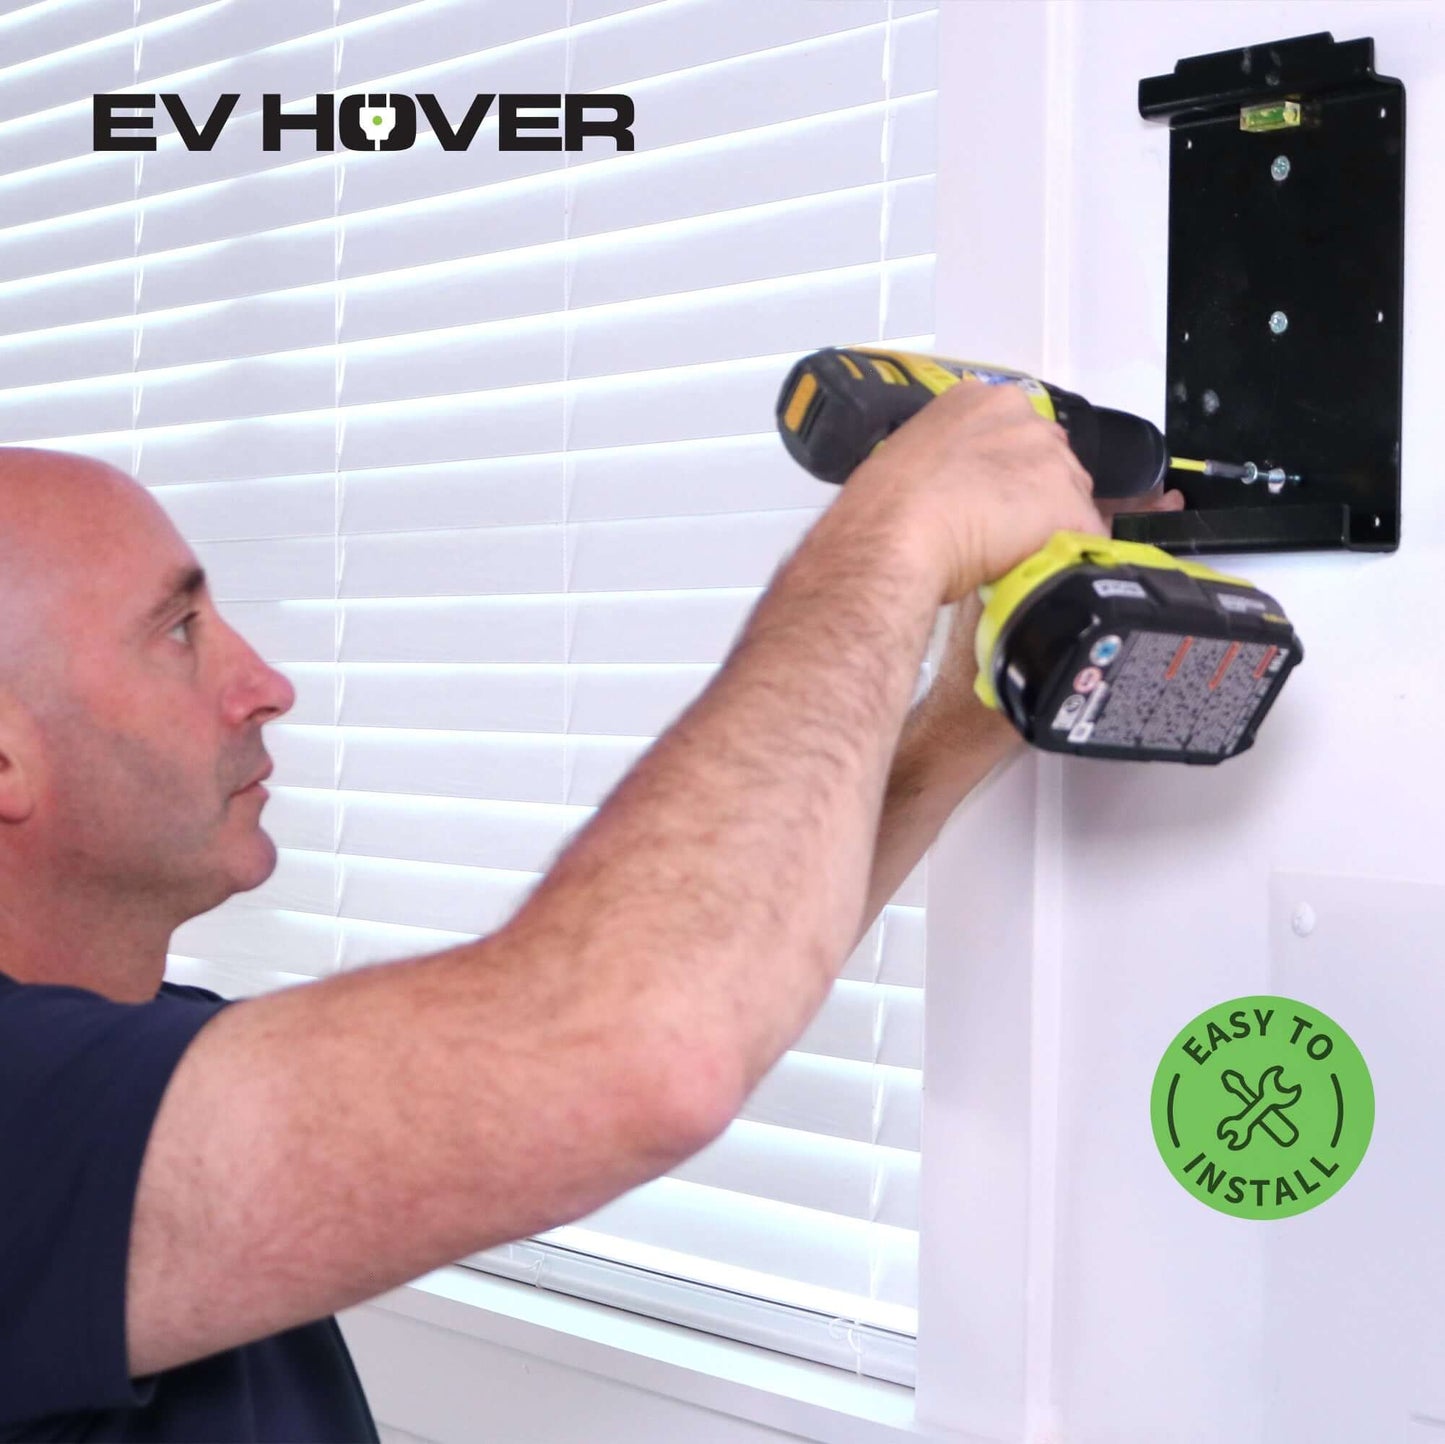
[2] Wall Mount Bracket
[3] 4 Velcro Straps
[4] 4 ¼” x 2 ½” - 7/16” Hex Head Lag Bolts
[5] Instruction Manual
[6] 4 Number 8 x ⅜” Sheet Metal Screws
[7] 2 ¼” - 20 x ¾” Button Head Socket Cap Screw
[8] 2 ¼” - 20 x ½” Button Head Socket Cap Screw
[9] Hook
[17] Steel Tube
Tools Provided
[10] Level
Optional
[11] Adapter Wall Bracket

EV Hover Extender Parts
[6] 4 Number 8 x ⅜” Sheet Metal Screws (Replacement)
[12] Aluminum Extension Tube
[13] Plastic End Cap
[14] Conical Washer
[15] Stainless Steel Flat Washer
[16] Shoulder Bolt
[18] Lock Nut

Step 1 - Remove EV Hover from wall mount bracket [2]
A. Secure the EV Hover arms by wrapping with painters tape.
B. Remove the EV Hover unit from the wall and place it on a table.
Step 2 - Attach the Extender
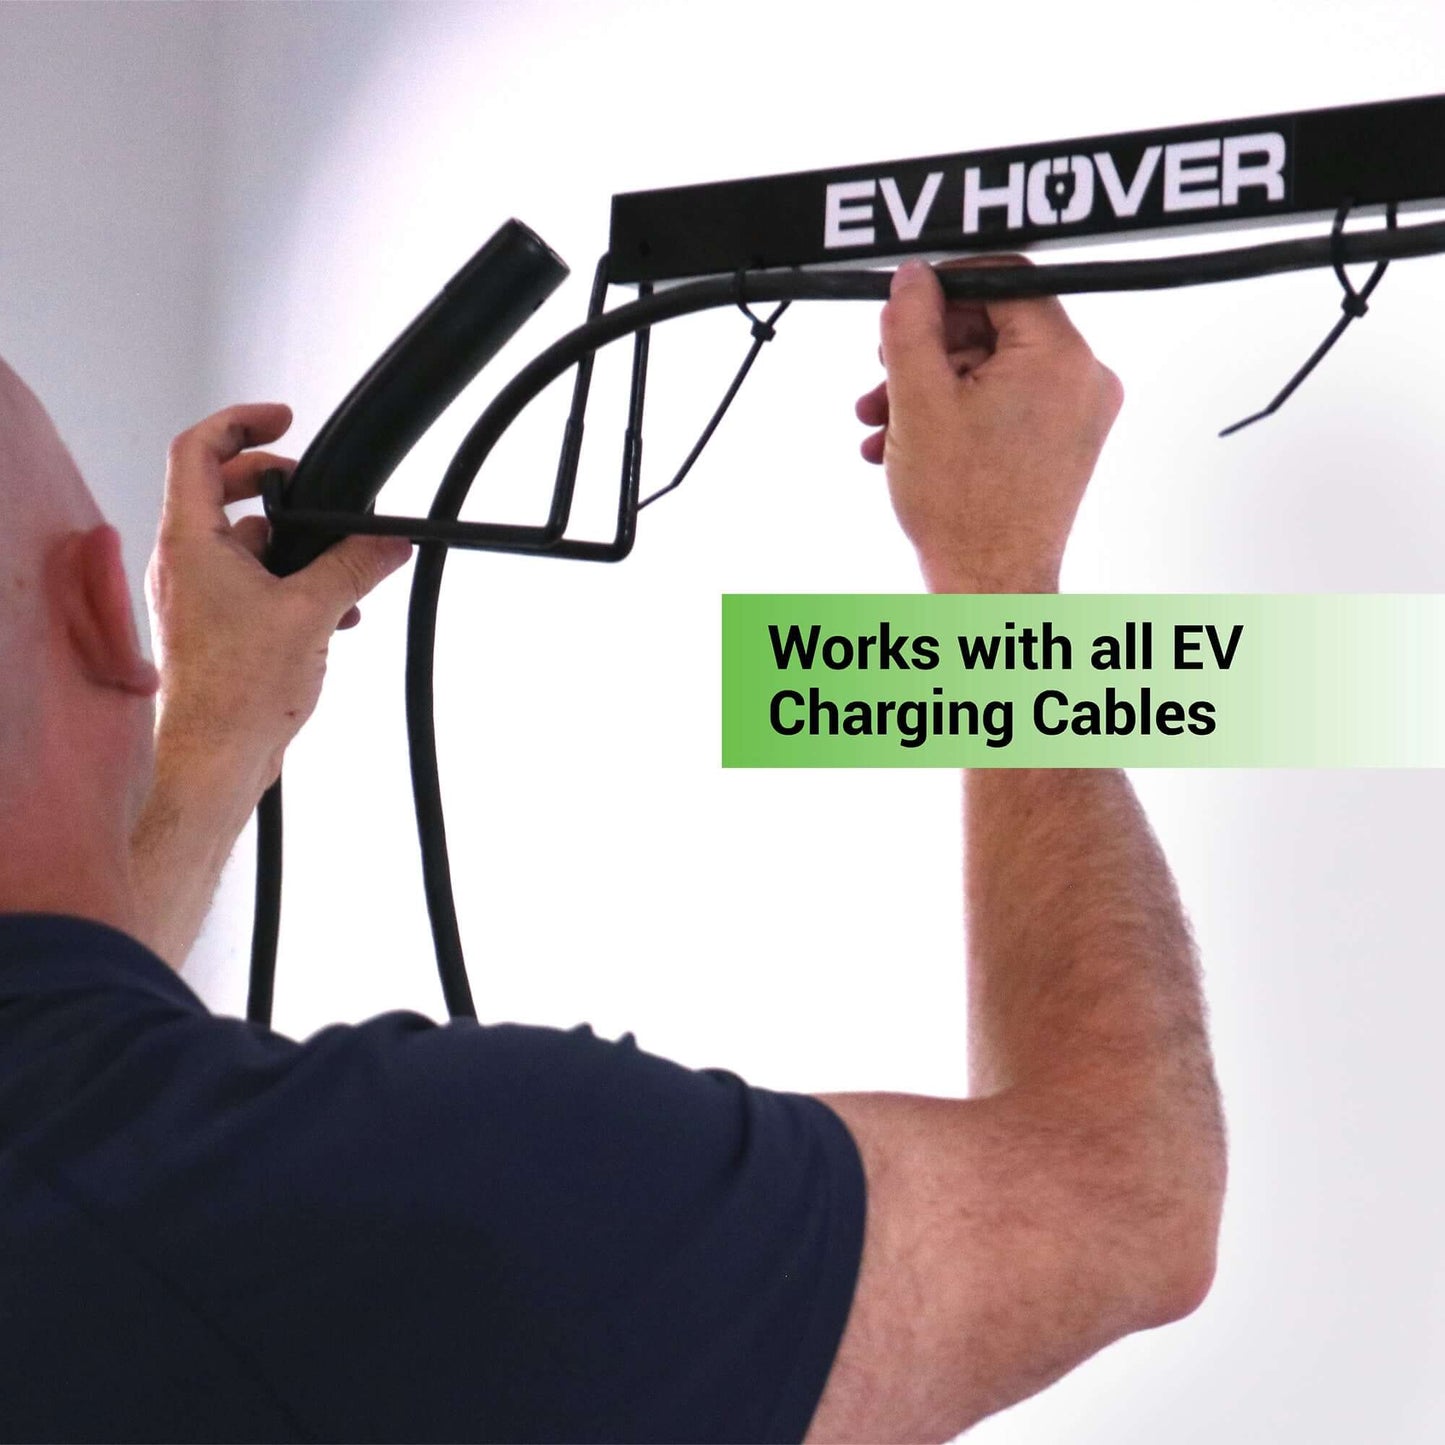
C. Remove the four (4) #8 Sheet Metal Screws [6] and slide off the hook [9]. Discard the four screws (new screws are provided) and save the hook [9] for reattachment later.
D. Press the provided Plastic Cap [13] into the end of the Steel Tube [17]- use a dead blow hammer for best results.
E. Thread a Conical Washer [14] (high point toward the head to the bolt) and a Stainless Steel Washer [15] into the Shoulder Bolt [16].
F. Thread the Shoulder Bolt [16] through the Aluminum Extension Tube [12] and then through the Steel Tube [17].
G. Now thread a Stainless Steel Washer [15], a Conical Washer [14] (high point down), and another Stainless Steel Washer [15] onto the bottom portion of the Shoulder Bolt [16]. Note that the last Stainless Steel Washer [15] barely engages the Shoulder Bolt [16].
H. Finally thread the Lock Nut [18] onto the thread of the Shoulder Bolt [16].
I. Tighten the Lock Nut [18] using a deep well 1/2” Socket Wrench while securing the top of the Shoulder Bolt [16] with a 3/16” Allen Wrench. Make sure to apply pressure to the last Stainless Steel Washer [15] with the Socket Wrench to keep the washer [15] engaged on the shoulder bolt [16]. If the washer [15] slips off the shoulder bolt [16], slightly loosen the lock nut [18] and try again.
J. Tighten the Lock Nut [18] firmly against the shoulder of the Shoulder Bolt [16]. Ensure that the last Stainless Steel washer [15] is centered and engaged onto the body of the Shoulder Bolt [16].
K. Using the new #8 Sheet Metal Screws [6], reinstall the hook [9] onto the end of the Aluminum Extension Tube [12]. Since the Steel Tube [17] is slightly smaller than the Aluminum Tube [12], it may be necessary to bend the top and bottom flanges of the hook [9] slightly with a pair of pliers for a good fit.
Step 3 - Reinstall the EV Hover onto the Wall
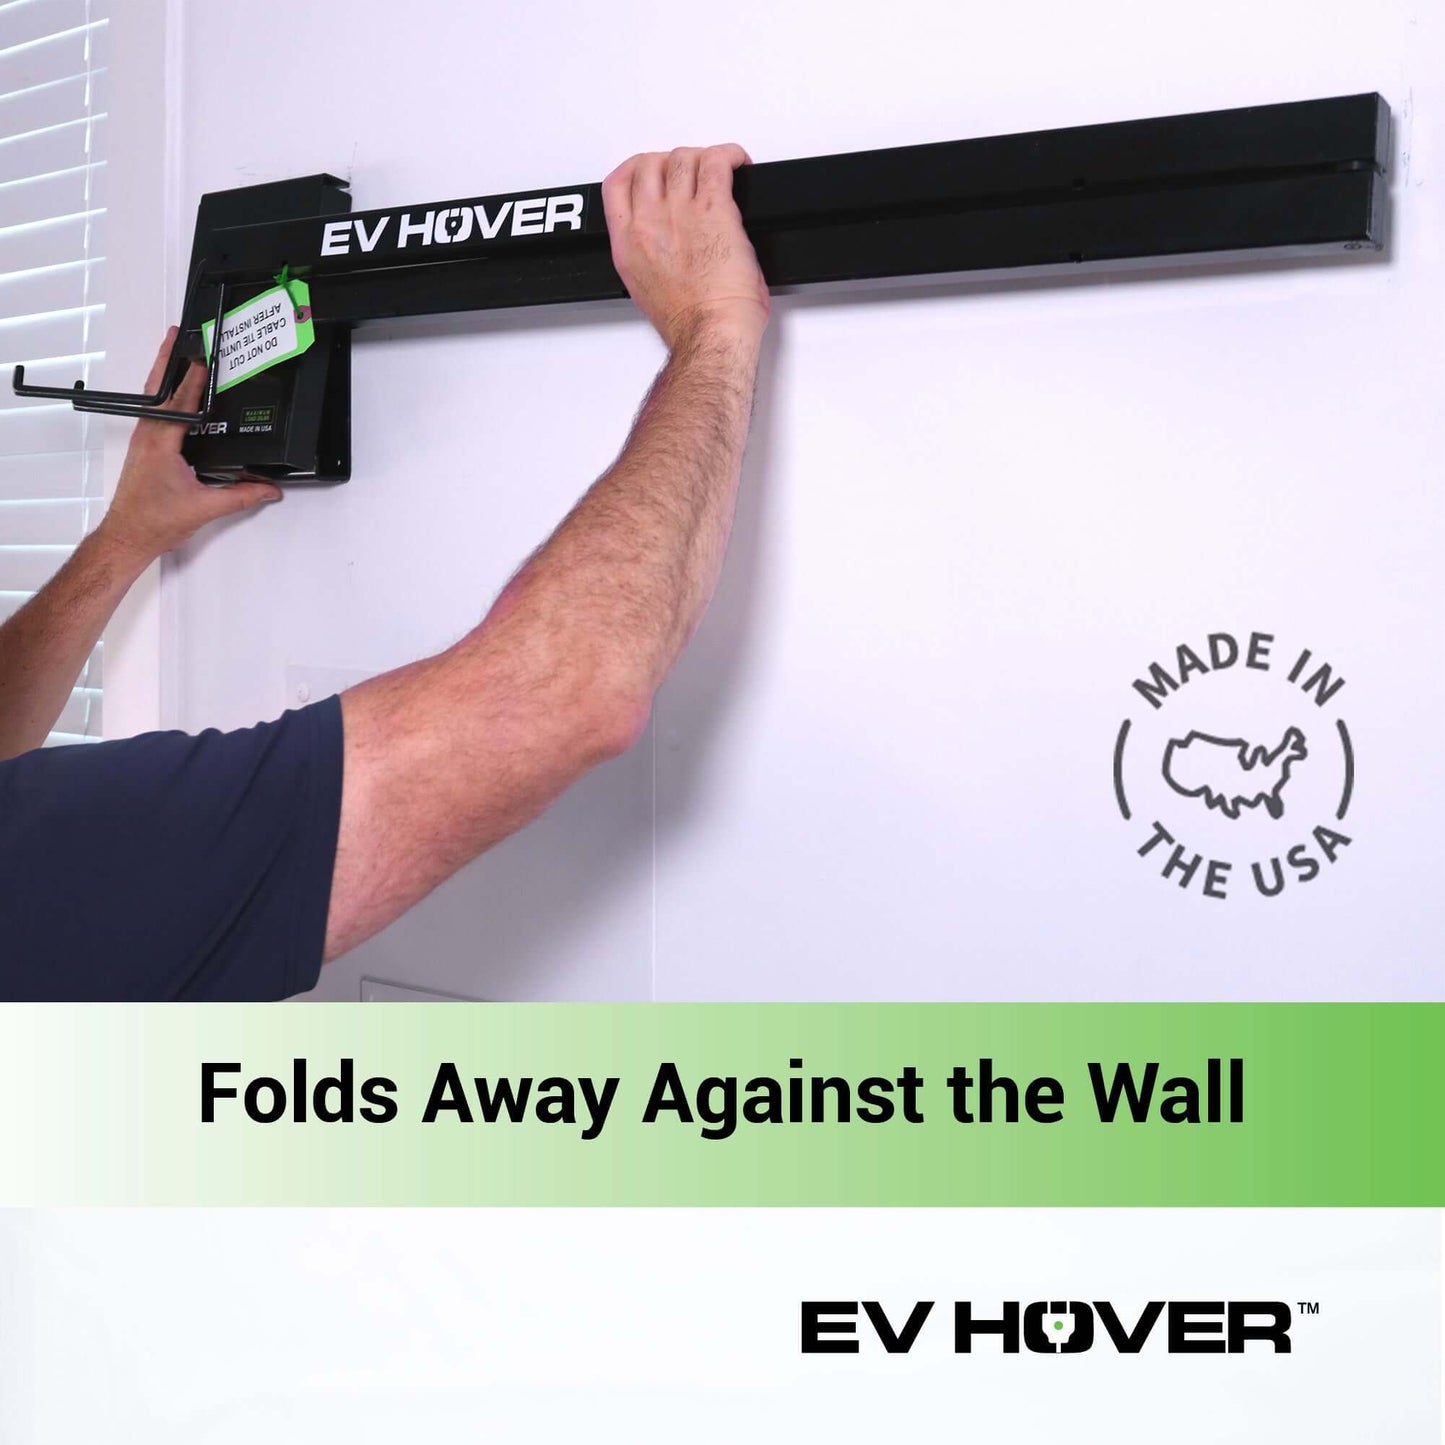
L. Collapse the EV Hover Unit into the most compact state. Wrap painter’s tape around arms to secure them in place.
M. Hang the EV Hover [1] back onto the wall mount bracket [2] by placing the keyholes of the EV Hover onto the Cap Screws [7] that were previously installed on the top of the wall mount bracket [2].
N. Insert the Cap Screws [8] through the bottom holes of the EV Hover into the wall mount bracket and tighten.
O. Cut through the tape with scissors and extend the arms.
Step 4 - Reinstall the EV Hover onto the Wall
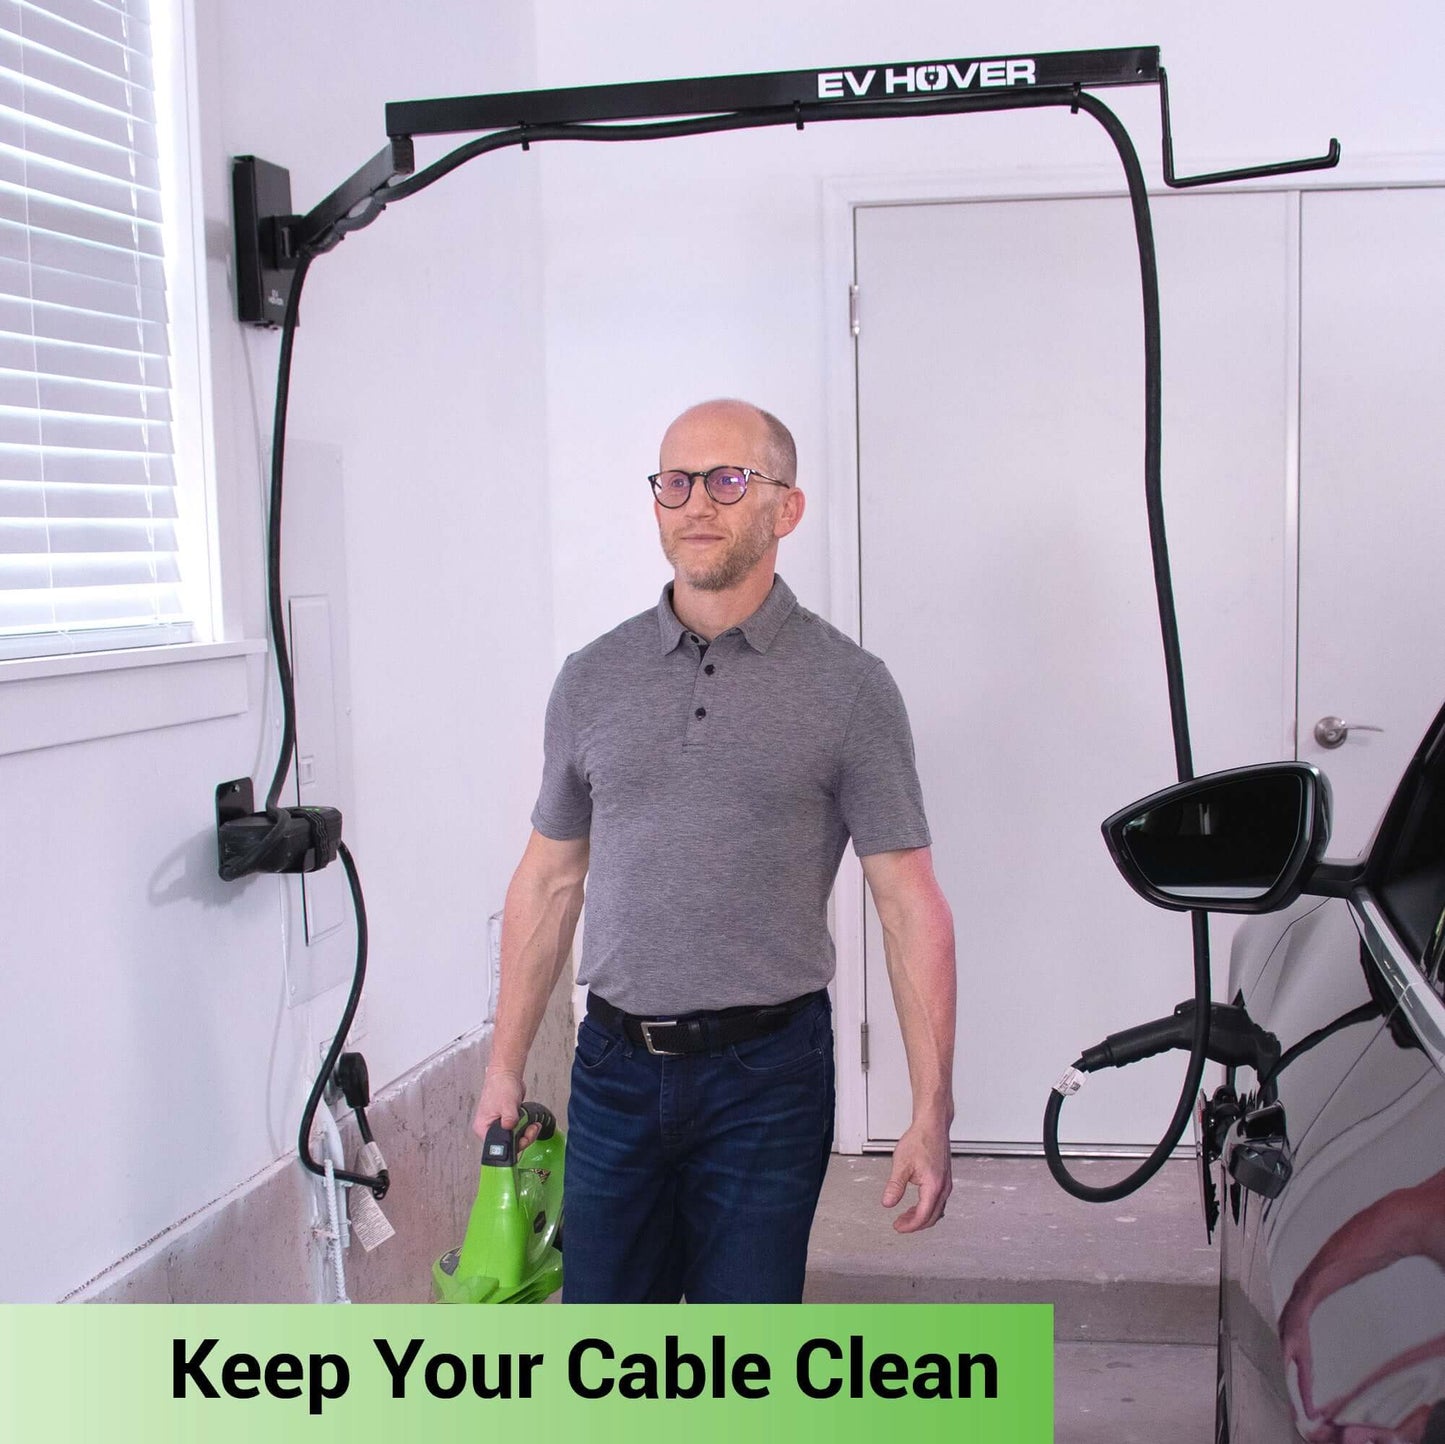
P. Install the velcro straps by wrapping them around the cable and EV Hover, leaving room for movement. Next, adjust your cable to the appropriate length allowing enough length for the end of your charger cable to hang down below the hook to reach your vehicle and then tighten the velcro straps. Adjust the hook [9] as needed by squeezing or pulling apart.
Congratulations, your EV Hover is fully functional and ready to go!
EV Hover does not require routine maintenance however, periodic inspections should be conducted to ensure that all parts remain in good working order and no damage exists. Do not attempt to open, disassemble, repair, tamper with, or modify any components of the products – the products are not user serviceable. Contact EV Hover for any repairs.


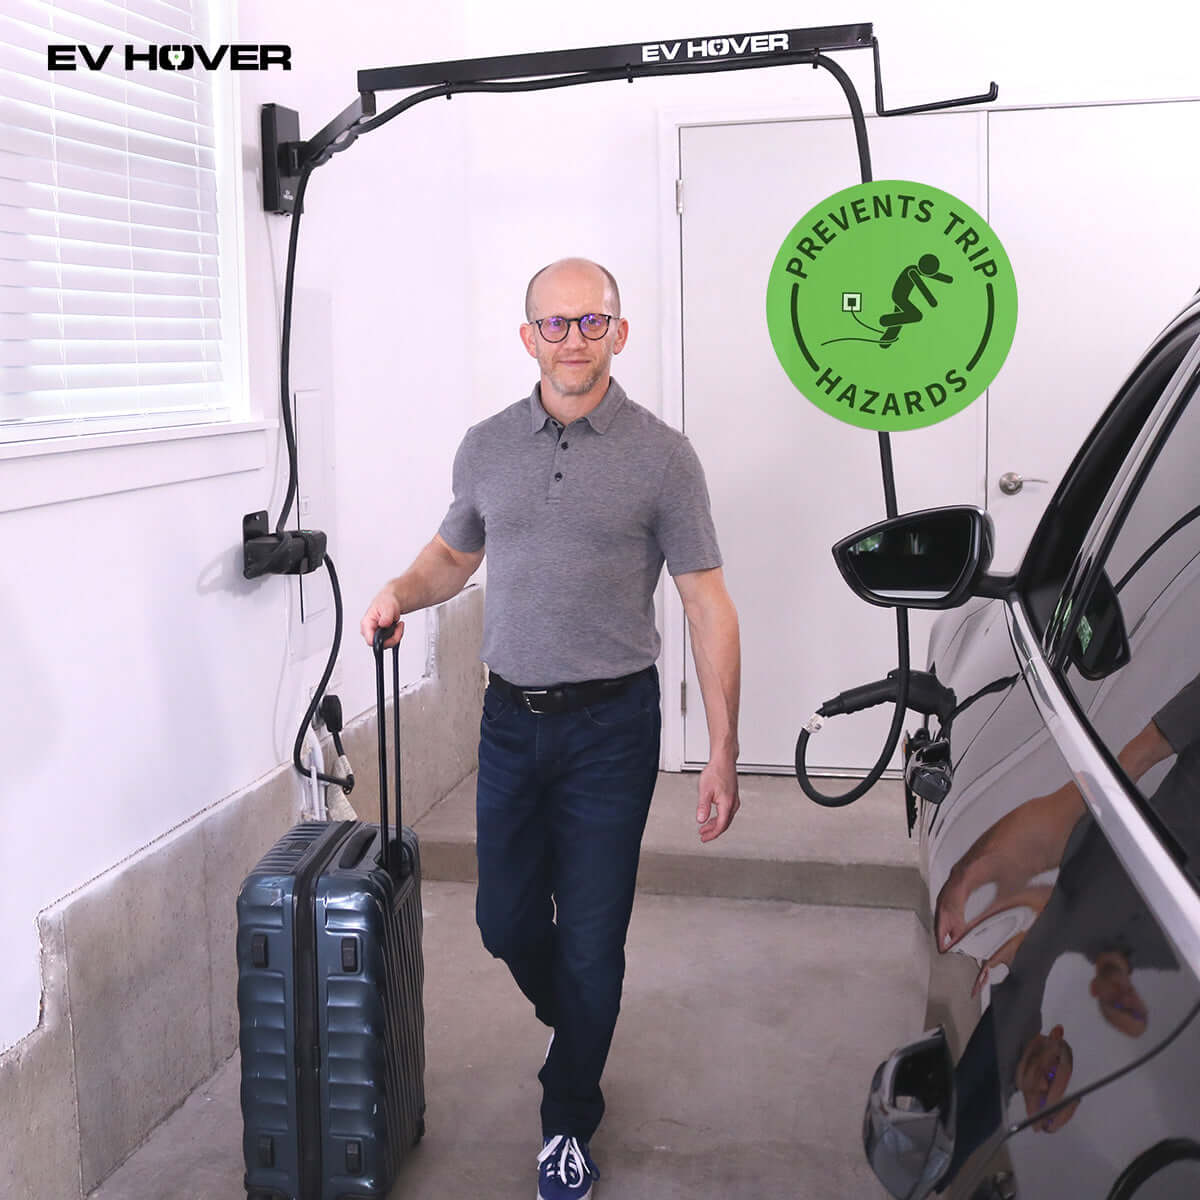
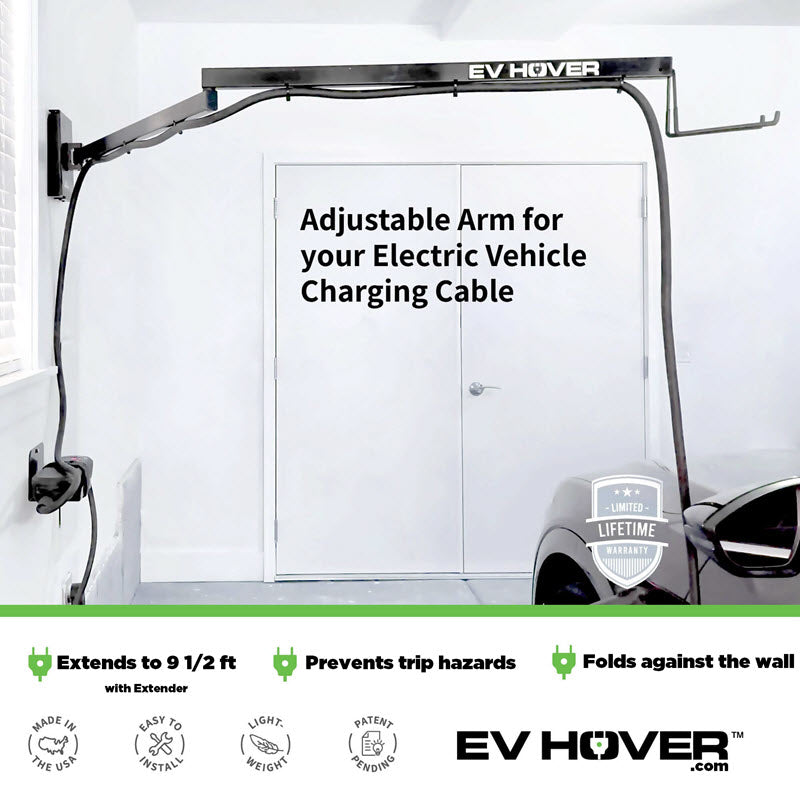
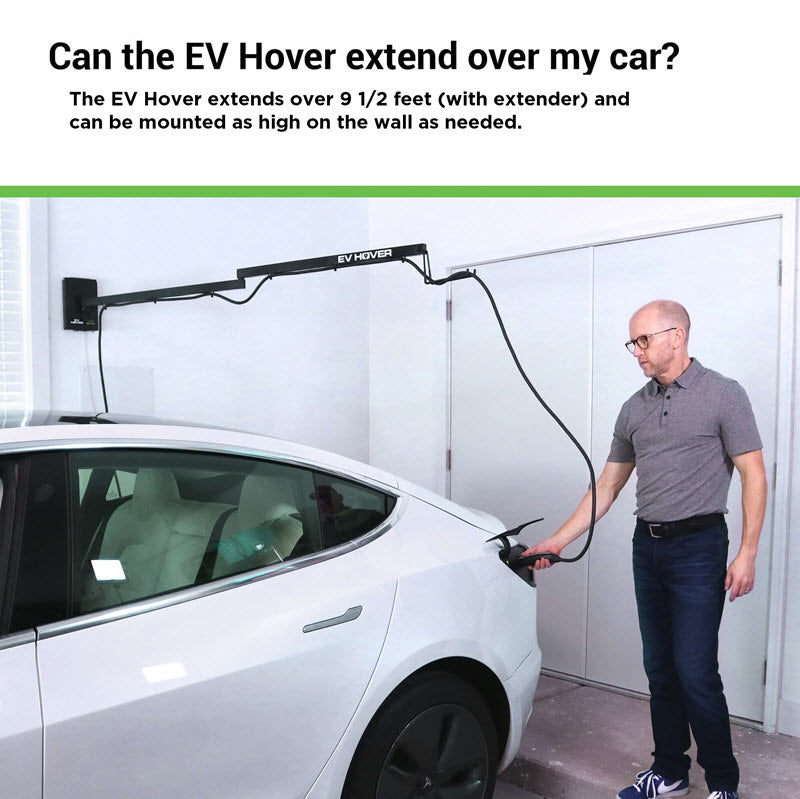
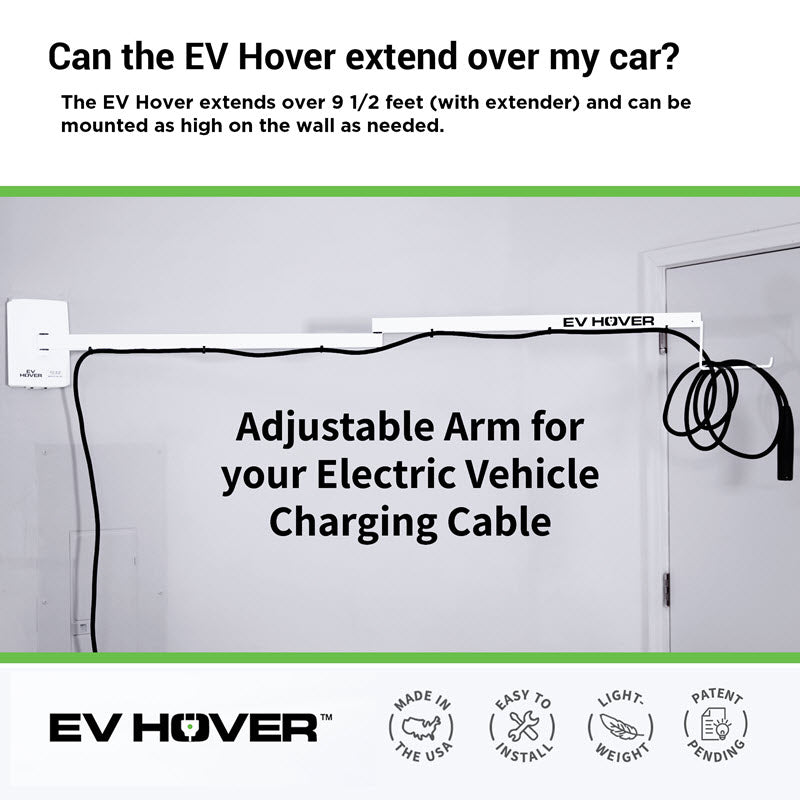
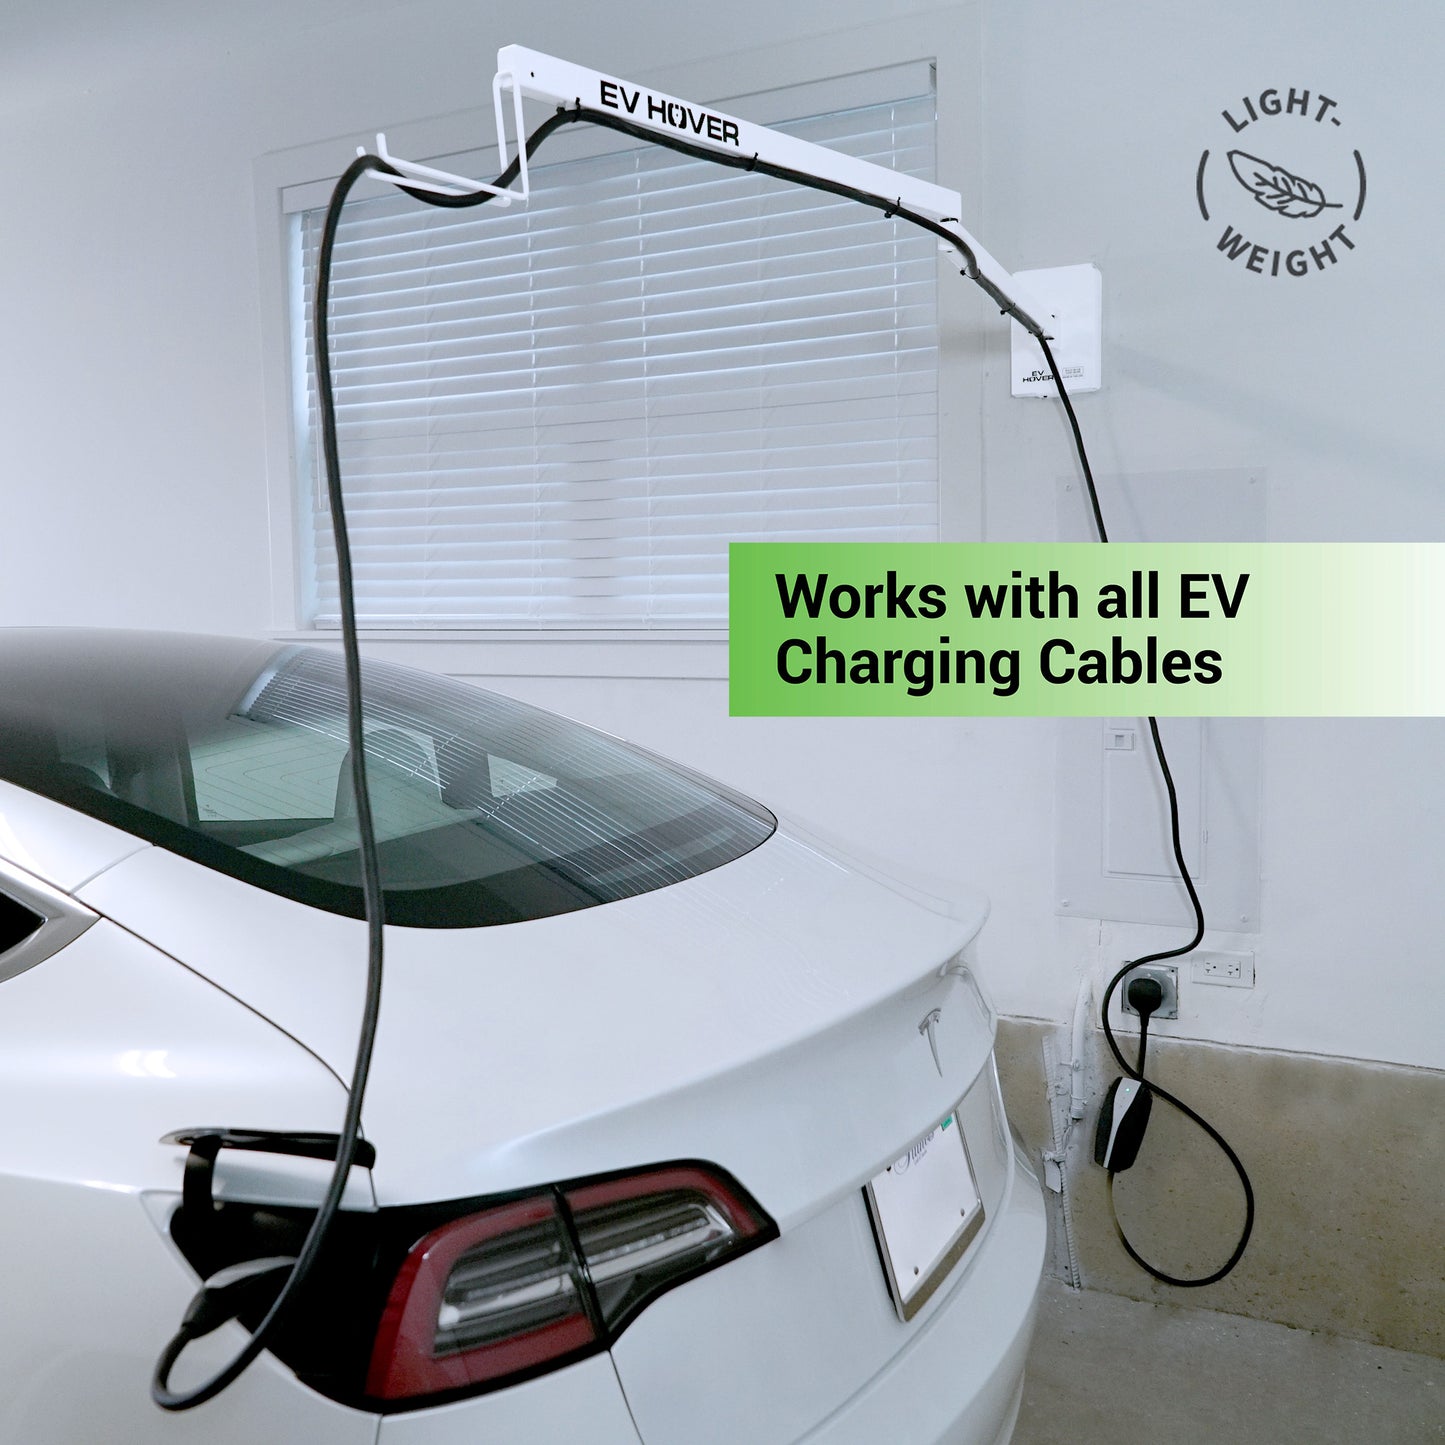
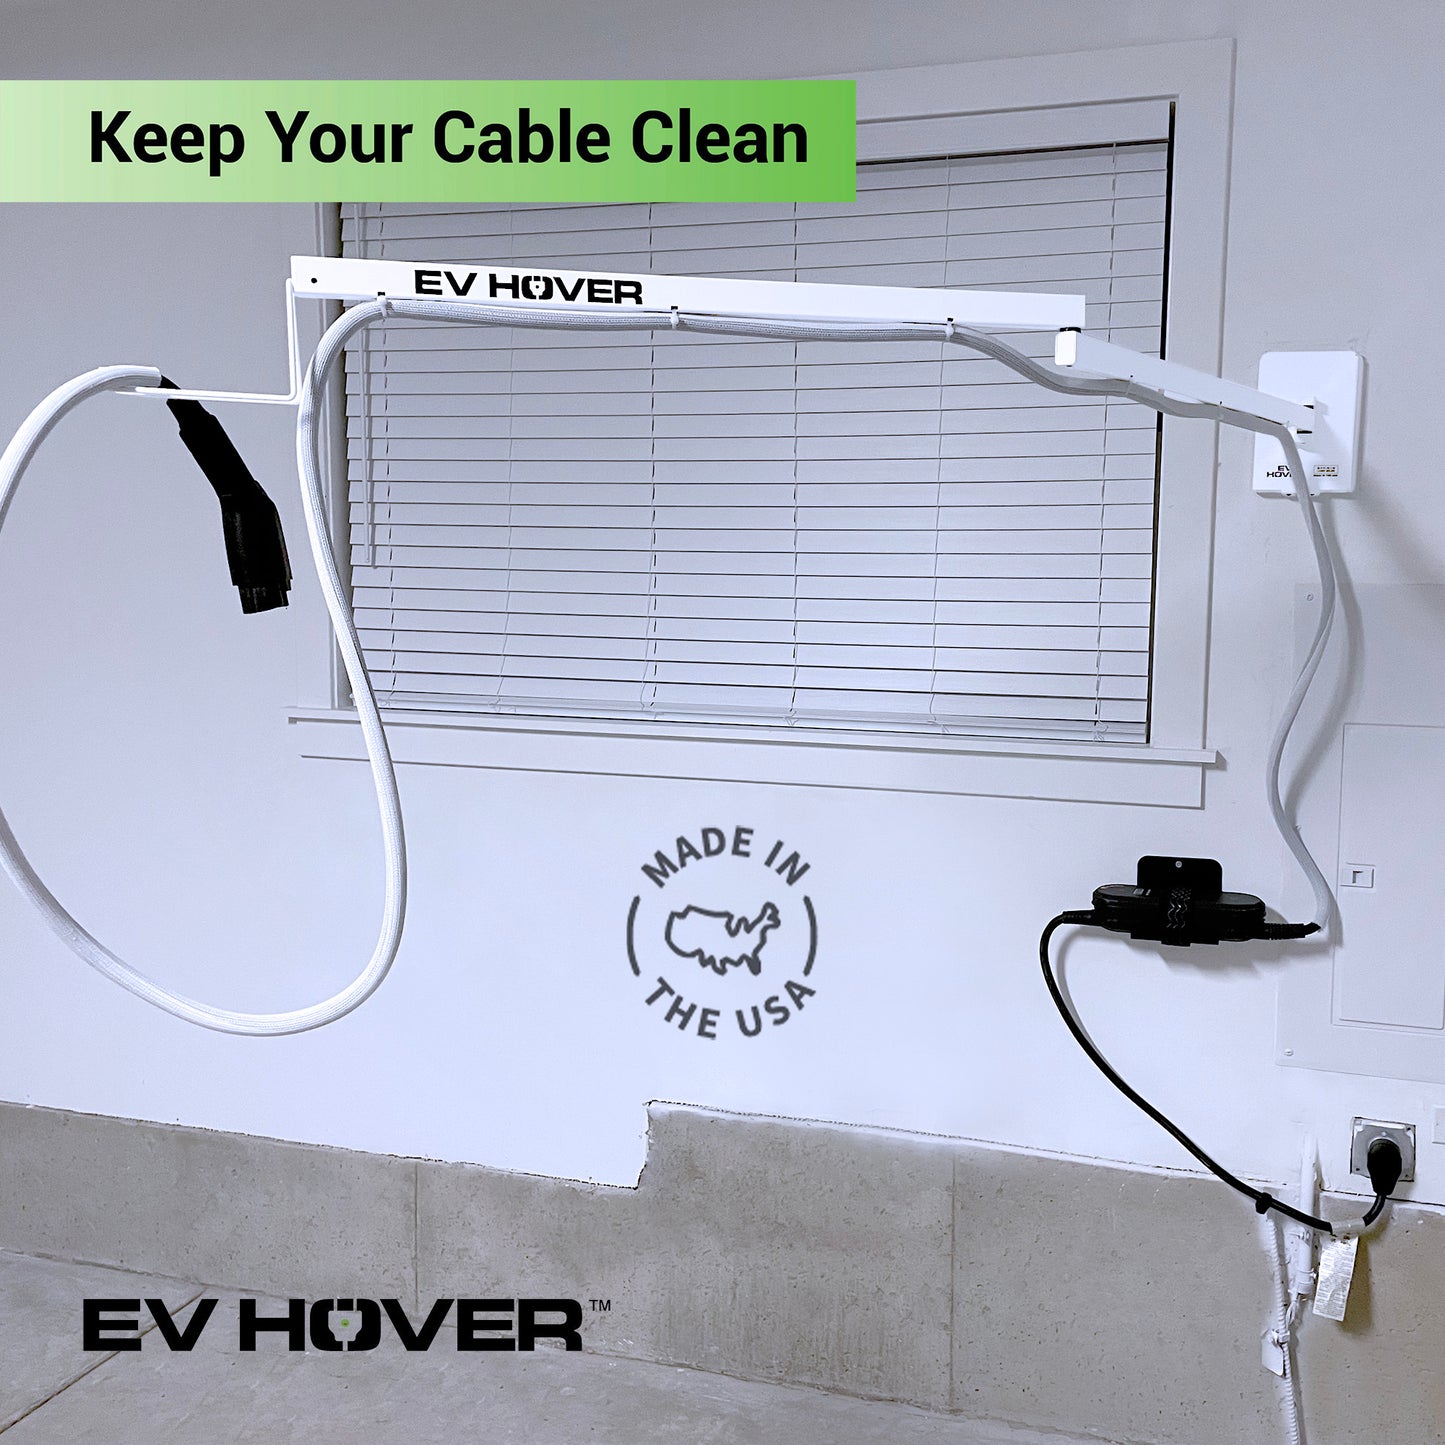
EV Hover
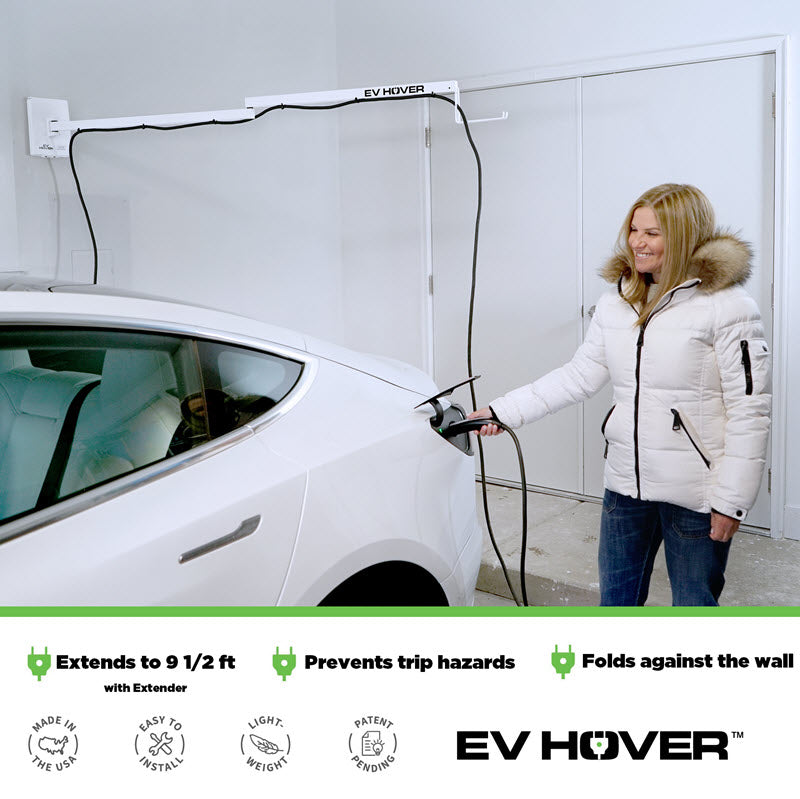
EV Hover - Electric Vehicle Cable Management System (Up to 9 1/2 ft with the extender - sold separately)
Share